FluxCD- How it works?

Introduction
Welcome to the world of FluxCD, a powerful tool for DevOps Engineers managing Kubernetes deployments. In this blog series, we’ll explore how FluxCD simplifies the process of updating and deploying Kubernetes manifests. Today, we’ll start with a quick overview of FluxCD’s workflow, covering key steps from setup to deployment.
High-Level Overview
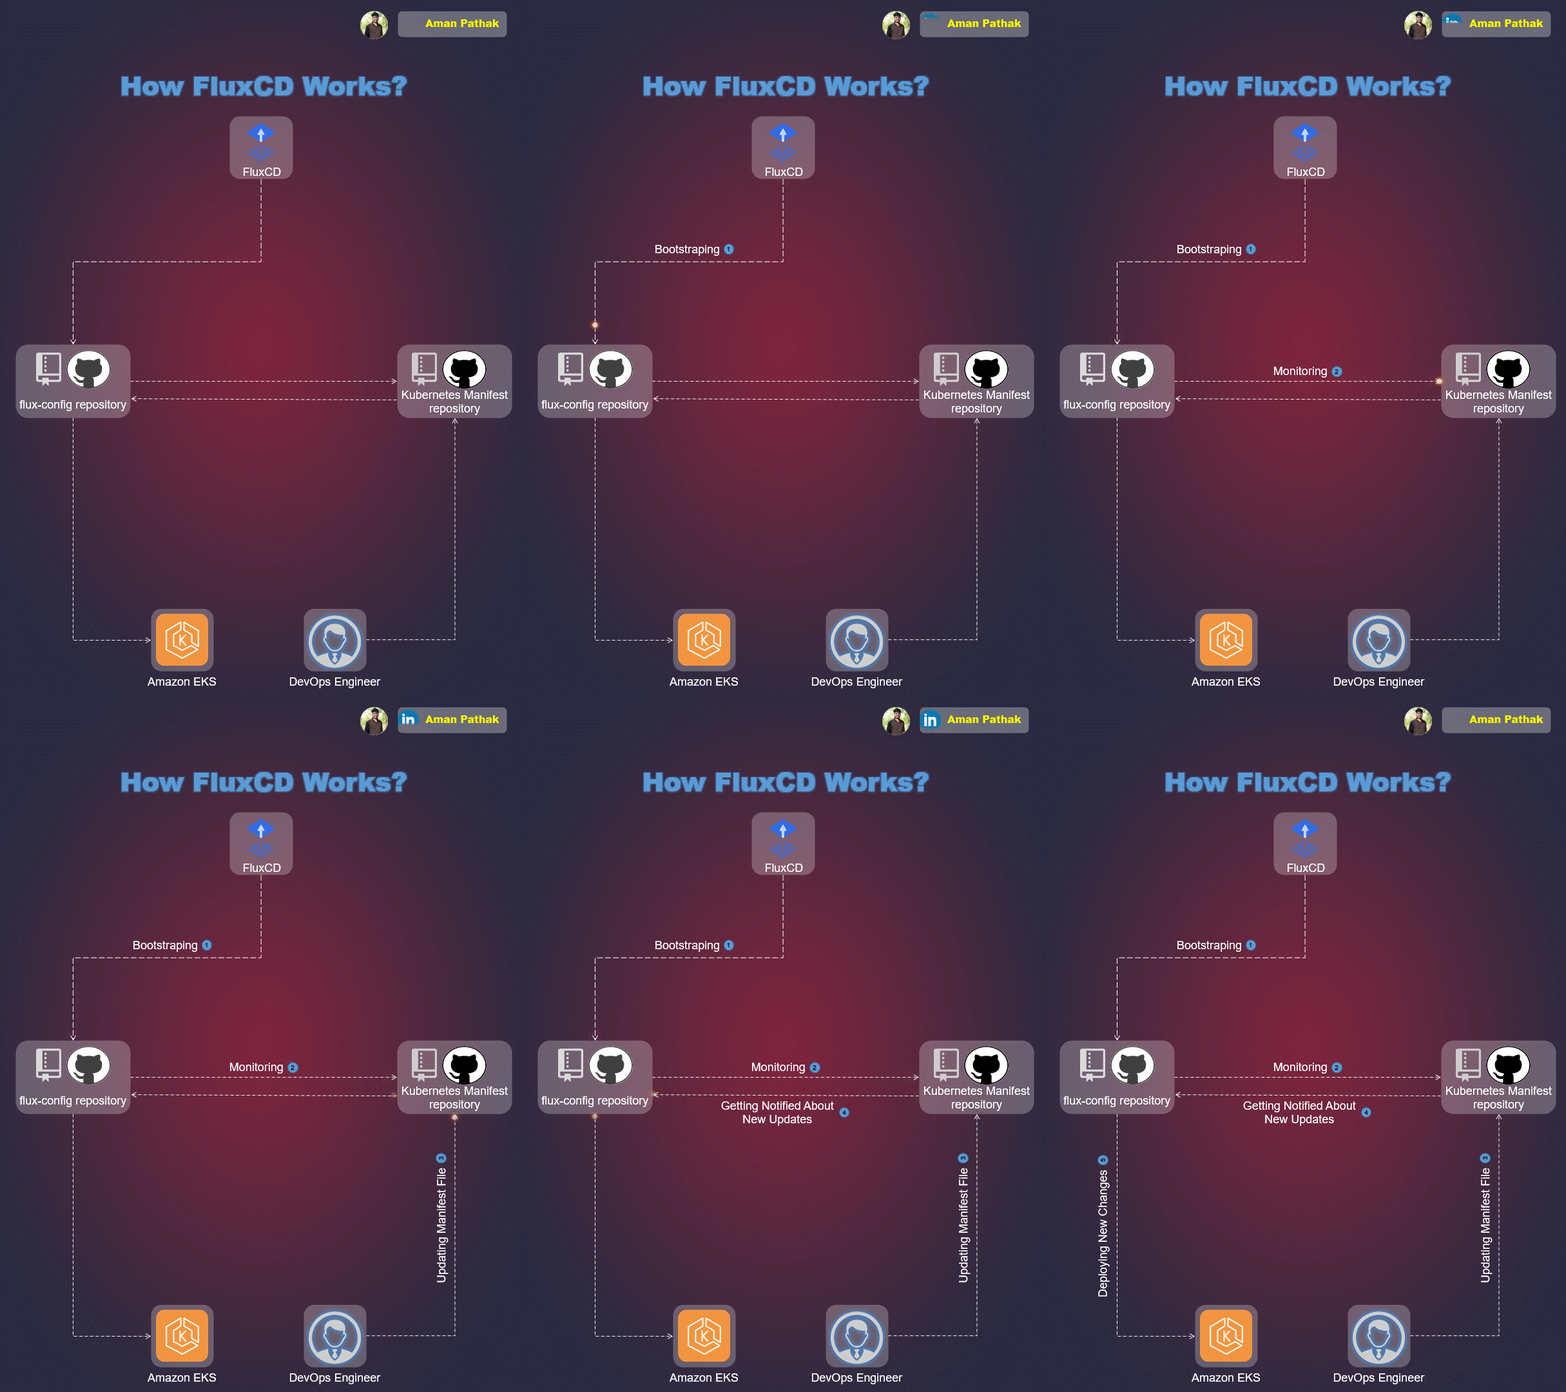
1. Bootstrapping: The first step is bootstrapping. This involves FluxCD creating a GitHub repository on your GitHub account. By default, the repository is named flux-config. Additionally, we’ll include the link to our Kubernetes Manifest file repository in one of the YAML files within the flux-config repository.
2. Monitoring: Once the Kubernetes Manifest file repository link is added to the YAML file, FluxCD continuously monitors for any changes.
3. Updating Manifest Files: Suppose a DevOps Engineer makes changes to the Kubernetes Manifest file repository.
4. Alerting: FluxCD, As flux-config repository keeping an eye on the given repository link. So, it’s get notification about the new changes in the given repository link
5. Deploying Updated Manifest Files: FluxCD then proceeds to deploy the new changes to your AWS Elastic Kubernetes Cluster.
Conclusion
In this brief introduction, we’ve touched on FluxCD’s capabilities. Stay tuned for more detailed insights in the upcoming posts, where we’ll break down each step of the FluxCD workflow. Together, we’ll make managing Kubernetes deployments easier and more efficient with FluxCD. Keep an eye out for the next installment!
Support my work-
https://www.buymeacoffee.com/aman.pathak
Stay connected on LinkedIn: LinkedIn Profile
Stay up-to-date with GitHub: GitHub Profile
Feel free to reach out to me, if you have any other queries or want to discuss trending technology in the DevOps & Cloud domain
Community Link- https://lnkd.in/gE2KHNmR
Happy Learning
